The Principles of Design
The art of flower arranging is more than just throwing a bunch of stems into a vase. To achieve an aesthetically pleasing design, you need to keep in mind balance, proportion and overall harmony. Every arrangement should have a focal point or emphasis, something that draws the viewers’ attention. That could be a larger flower, a unique bloom or a different color that stands out. You also want to consider the overall shape of the end result. Do you want something short and round or tall and triangular? When creating that shape, make sure that you’re keeping it balanced. The easiest way to achieve this is by creating a mirror image on either side of the central point.
Basic Blooms
For beginners learning how to arrange flowers, working with certain types of blooms can be more forgiving and easier to handle.
Roses:Widely available in various colors, roses are sturdy flowers and can be easier to handle for beginners (just watch out for thorns!).
Carnations:Relatively inexpensive and long-lasting, carnations come in plenty of colors and have sturdy stems.
Gerbera Daisies:These too have sturdy stems, take up a lot of space in an arrangement and come in plenty of bright, cheery colors.

Alstroemeria:These flowers have multiple blooms on a single stem, making them a great bang for your buck, plus they have a long vase life.
Baby’s Breath:This filler flower is making a big comeback in floral design, adding a delicate touch to arrangements, and it can be moved around a lot without losing any of the tiny buds.
Sunflowers:Their large heads and sturdy stems make them easy to arrange, plus you don’t need to add many other flowers — just some greenery and smaller filler flowers — to make a big impact.
Greenery:Adding in eucalyptus, ferns or leatherleaf can add texture to an arrangement and will fill in any holes left between the florals.
Tips for a Beautiful Bouquet
You’ve chosen your flowers, greenery and filler; have a general idea of balance and design in your mind; now it’s time to start arranging. But before you do, take note of these tips that will help make your experience easier.
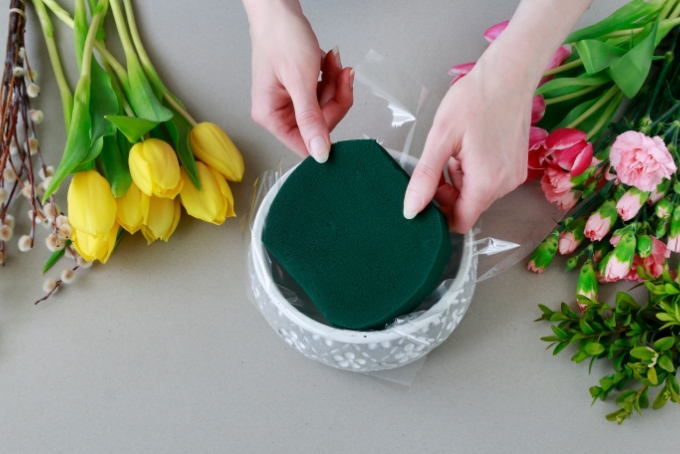
Use floral foam
Particularly if your vase has a wide opening, it’s helpful to use floral foam to hold the flowers in place. This will keep them from all falling to one side, and you won’t need as many flowers to create a beautiful arrangement. Trim your foam to fit your container and then let it soak fully in water. If you don’t have floral foam, you can also create a grid structure across the mouth of your container using floral tape or even regular Scotch tape. This works the same way as the foam, keeping your stems in place, making it easier to create your arrangement.
Trim and hydrate first. Before adding your flowers to an arrangement, cut the stems at a 45-degree angle to allow for better water absorption. Also, remove any leaves that will be below the water line to prevent bacterial growth. Place your cut stems into a separate container with water and flower food for 15 minutes (or longer) before you begin arranging to help keep them fresh longer.
Trim and hydrate first
Before adding your flowers to an arrangement, cut the stems at a 45-degree angle to allow for better water absorption. Also, remove any leaves that will be below the water line to prevent bacterial growth. Place your cut stems into a separate container with water and flower food for 15 minutes (or longer) before you begin arranging to help keep them fresh longer.
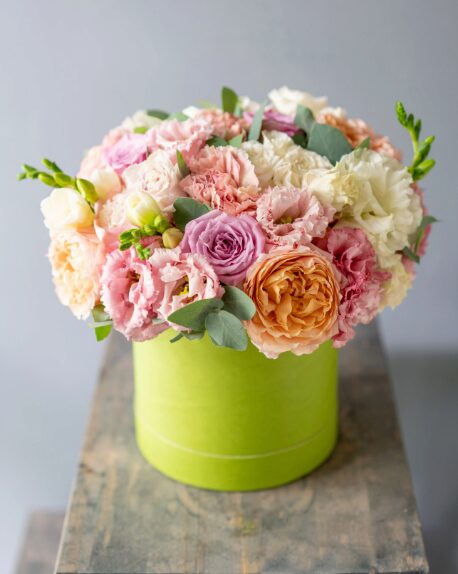
Start with the largest flowers first
Select a primary flower or a few larger blooms to be the center of attention, and place them in the center of your container. Then use the smaller flowers to build around it, keeping in mind balance and symmetry. Finally, fill in the gaps with filler flowers and greenery to create depth and texture.
Keep your flowers consistent
Working with many different types of flowers can be challenging for a beginner, so start by focusing on a single type of flower or a single color palette. Once you get more experienced, you can start branching out with different types and shapes of blooms.
Change the water regularly
Check the water level daily, and make sure there’s enough to keep the flowers hydrated. If any of the flowers are starting to wilt, trim the stems once again. Fully change the water every few days and add some more flower food to extend the life of your arrangement.
Don’t over think it!
There’s really no right or wrong way to arrange flowers. Play with different colors, textures and heights to create visual interest. Trust that you know what you like and have fun with it!