.webp)
.webp)
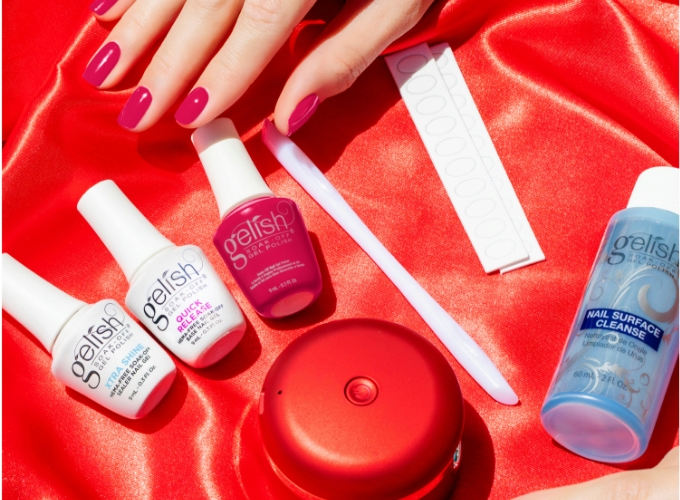
It’s All in the Prep
Nail pros will tell you one thing for certain: A long-lasting gel manicure always starts with proper nail prep—which means don’t jump straight into applying base coat. Rather, begin by pushing back your cuticles with a pusher, an orangewood stick, or even your own fingernails in a pinch. File your nails so they’re smooth and there aren’t any jagged edges. Then, with a very light hand, gently buff the surface of your nails. Keep in mind, this is just to remove the shine; you don’t want to file into your natural nail, otherwise you could cause damage to the nail plate. Finally, thoroughly wipe each nail with Nail Surface Cleanse to remove oil and debris. This step is often skipped in DIY manicures, but it makes a huge difference in how long your gel lasts. Leaving the oils and dust on your nails keeps the base coat from properly sticking, resulting in premature lifting.