Action button Close button

Forgot your password?

Please enter the email address and we'll send you a link to reset your password.

Sign In

Enjoy exclusive deals, offers, invites and rewards.

Create an account

Enjoy exclusive deals, offers, invites and rewards.

Personal Info

Sign In

Licensing Information

shopping bag
Open menu Close menu Button to open search module Customer icon logged Go to Forgot you password Go to Sign in page Open Shopping cart modal Close modal Remove product from cart
Spring’s Soft Focus
Facebook - Gelish Instagram - Gelish
Spring’s Soft Focus
From simple to extreme, these stunning nail art looks will leave you swooning.
BY GELISH
03.05.25

As soon as the weather starts warming up, we’re immediately ready to say goodbye to our subdued winter nail art and swap it out for bright and bold designs instead. And with the Now & Zen collection working as your ultimate source of color inspiration, you’ll be itching to create mini masterpieces for spring. Whether you’re drawn to simple designs or statement-making looks, the combination of delicate pastels and daring pops of color in this collection will allow you to create art that captures the essence of the season. Here, Gelish nail artist Erin Eng creates two versions of nail art looks that ranges from effortlessly chic to avant garde using Gelish Soak-Off Gel Polish and Morgan Taylor Nail Lacquer to inspire your own spring designs.

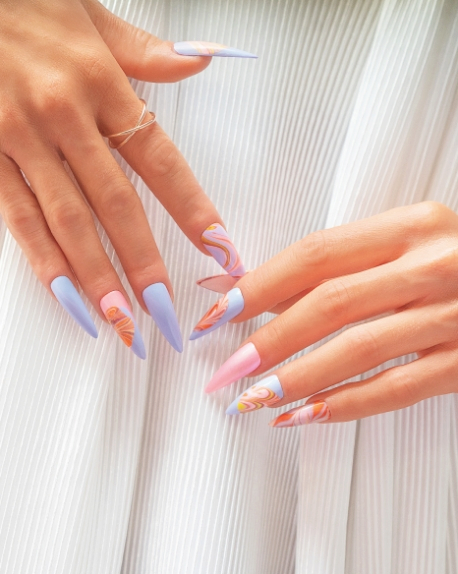
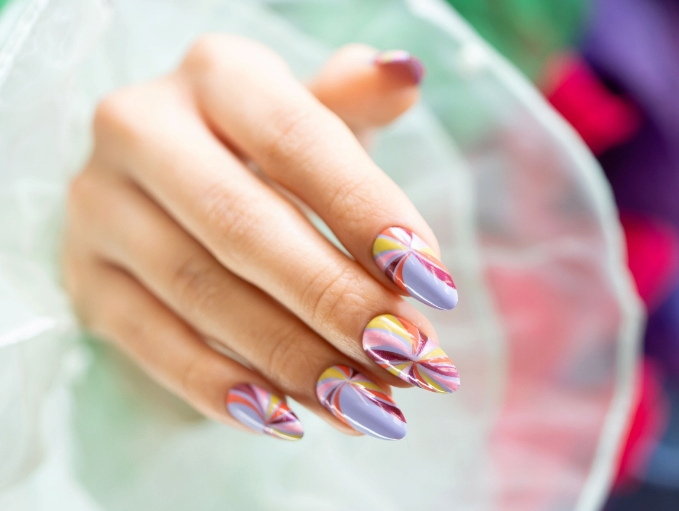
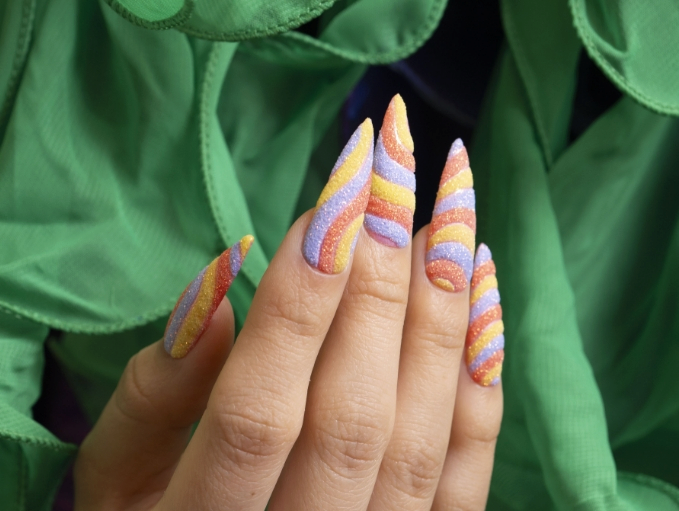
Candy Crush: Minimalist

The colorful swirls in this confection-inspired set bring to mind a giant pinwheel lollipop—sweet and playful at the same time!

Step 1: After prepping the nails, apply a thin coat of Morgan Taylor Stick With It Base Coat.
Step 2: Apply two coats of Morgan Taylor Can’t Burst My Bubble, making sure to cap the free edge with each application. Allow to dry completely.
Step 3: Using a liner brush, create curved lines starting at the center of the nail and working outwards, thickening the line as you go. Alternate using I’m All Cheers, Perk Up Buttercup, Hugs And Blisses and Sipping On Serenity.
Step 4: Allow to dry before floating Morgan Taylor Need For Speed Top Coat over the entire nail to seal in the design. Finish with Morgan Taylor Remedy Renewing Cuticle Oil.

Candy Crush: Maximalist

You can sweeten the deal of this design by adding length and texture to take it up a notch for the slightly more daring.

Step 1: After prepping the nails, apply a thin coat of Gelish Foundation Base Gel, and cure for 5 seconds in your LED light.
Step 2: Apply two coats of your favorite color of Gelish from the Now & Zen collection, curing for 30 seconds after each coat. Finish with Gelish No Cleanse Top Coat, and cure for 60 seconds.
Step 3: Working on one nail at a time, use your striper brush to paint stripes across the nail using I’m All Cheers, Can’t Burst My Bubble and Perk Up Buttercup. Do not cure.
Step 4: Sprinkle glitter over the uncured gel polish making sure to coat all parts of the design. Cure for 60 seconds.
Step 5: Brush off any remaining powder and apply Gelish Nourish Cuticle Oil with Hyaluronic Acid.

In Bloom: Minimalist

Oversized hand-painted florals take tips from cutesy to fashion while still keeping designs understated.

Step 1: After prepping the nails, apply a thin coat of Morgan Taylor Stick With It Base Coat.
Step 2: Apply two coats of Morgan Taylor Can’t Burst My Bubble on two nails and Perk Up Buttercup, Hugs And Blisses and Star Walking on the other three nails, making sure to cap the free edge with each application. Allow to dry completely.
Step 3: Use a detail brush to paint flowers using I’m All Cheers, Perk Up Buttercup and Sipping on Serenity. Don’t worry about being too perfect with the petals; the key to this design is to keep it soft and blended.
Step 4: Once you’re happy with your art, carefully float Morgan Taylor Need For Speed Top Coat over the entire nail to seal in the design. Finish with Morgan Taylor Remedy Renewing Cuticle Oil.

In Bloom: Maximalist

While perhaps impractical, you can’t deny that these over-the-top blossoms take top marks in artistry and beauty—and could very well be the perfect accessory for just the right occasion!

Step 1: After prepping the nails, apply a thin coat of Gelish Foundation Base Gel, and cure for 5 seconds in your LED light.
Step 2: Apply two coats of your favorite color of Gelish from the Now & Zen collection—we used Can’t Burst My Bubble, I’m All Cheers and Perk Up Buttercup—curing for 30 seconds after each coat. Apply Gelish Top It Off Top Coat, and cure for 30 seconds. Wipe the nail with Gelish Nail Cleanser.
Step 3: Sculpt flower petals with Gelish ProHesion Nail Sculpting Powder in Vivid White and Gelish Xpress Dip N Brush Can’t Burst My Bubble and Hugs And Blisses. ProHesion Nail Sculpting Liquid using your brush to create texture on each petal. Using a bead of Vivid White as your base, start assembling your flowers one petal at a time.
Step 4: Adhere the acrylic flowers to the nails using Gelish ProHesion in Crystal Clear or Gelish Hard Gel Clear (cure for 60 seconds if working with gel). Finish with Gelish Nourish Cuticle Oil with Hyaluronic Acid.

Get The Products

spring-2025-collection-banner
See available offers at gelish.com See available offers at gelish.com
undefined

Exclusive Offers

Privacy Policy

We use cookies for our Google Analytics, Facebook likes, and to keep an anonymized session. You can find out more on our privacy policy here. Privacy Policy. Go to Privacy Policy

bottle gelish
bottle gelish
bottle gelish
bottle gelish
bottle gelish

Loading

Swatching the right colors for you